GUIDE
This is a guide to the IoT World Gateway GUI which is a visualizing tool for your IoTWorld.
First view
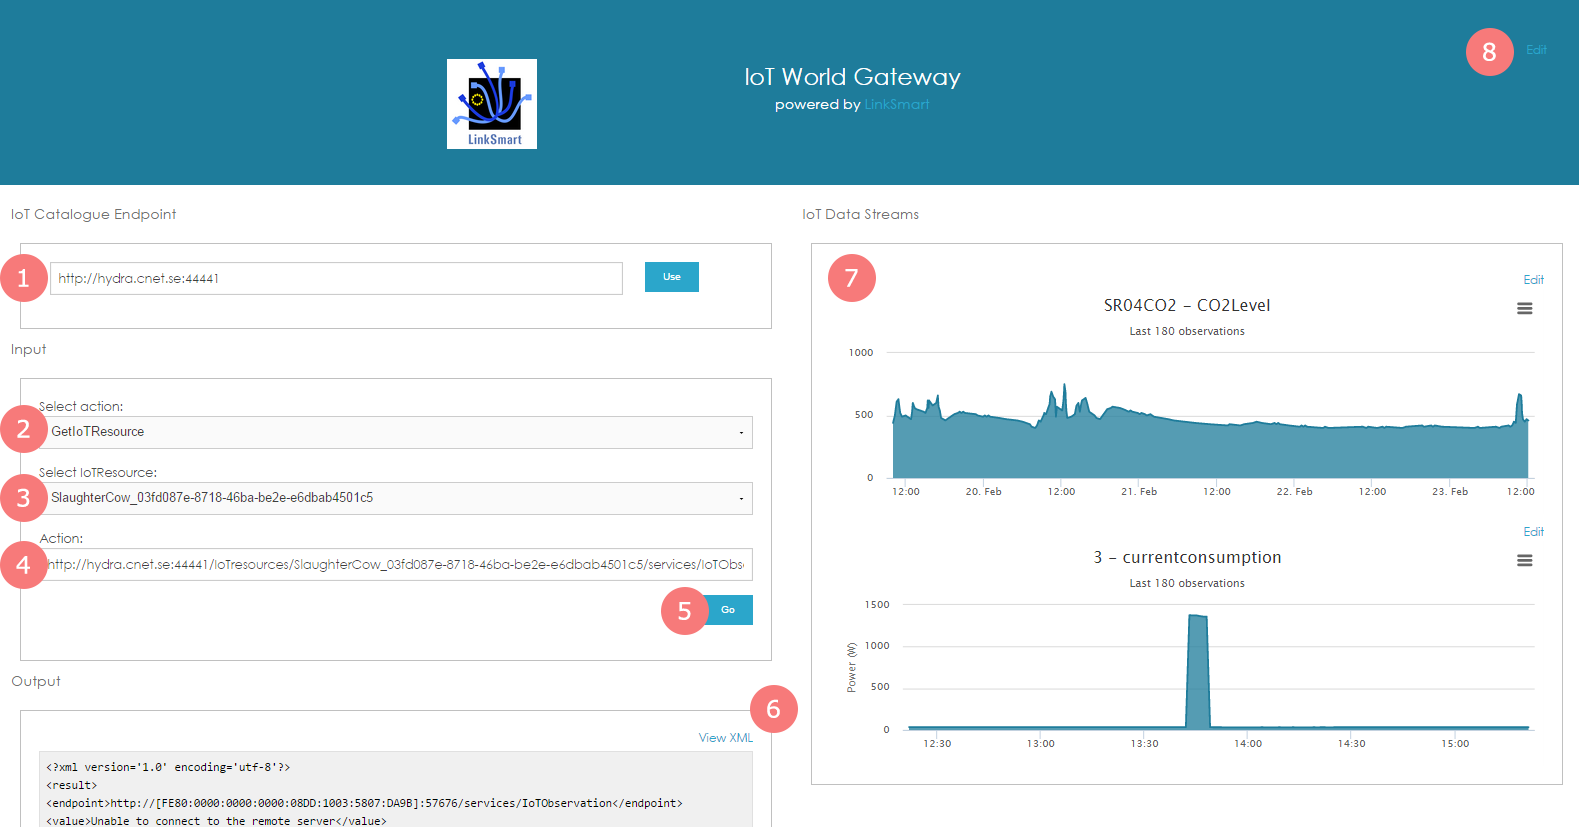
- Enter a valid endpoint and click use
- Select an action e.g. GetIotResource, GetIotResourcesEndpoints. Depending on this selection some or all of the following controls will be visible
- If the previous selection was GetIoTResource this list will appear where you can select the specific IoTResource to view
- This field shows the URL to the resource catalogue and changes depending on the previous selections
- The “Go” button visualizes the selected action in the “Output” window to the left bottom, and in the case of the GetIotResource action the IoTResource services will be shown to the top right (see next image).
- The “Output” window shows the xml results from the Resource Catalogue, by clicking the “View xml” link to the upper right corner of the window a new browser tab will be opened with the same results. You could also copy the URL from the previous action field (4) and get the same result.
- The “IoT Data Streams” window consists of two customizable charts showing two of the IoTResources. Which IoT Resource to show can be edited by clicking on the “Edit” button to the upper right of each chart.
- You can also edit the header of the page by clicking on the “Edit” button to the upper tight of the blue header
Select an IoT Resource
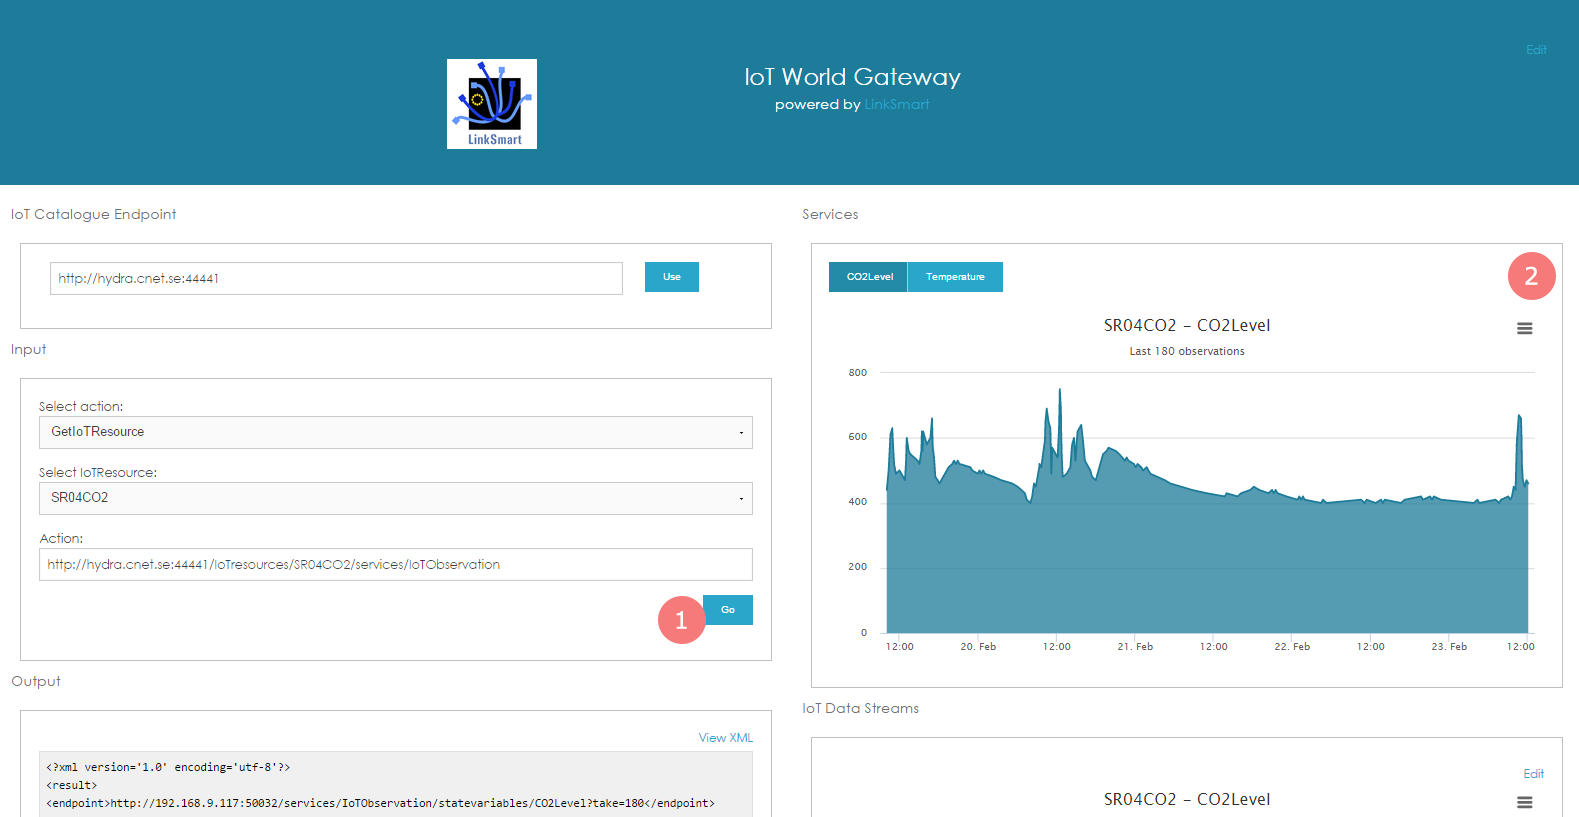
- Once you have selected an Iot Resource and klicked “Go” the “Output” window will be updated and another window called “Services” will appear to the right
- The “Services” window show all services provided by the IoT Resource as buttons. Clicking one of the service buttons will generate a chart showing the last 180 measurements
Edit IoT Data Stream Charts
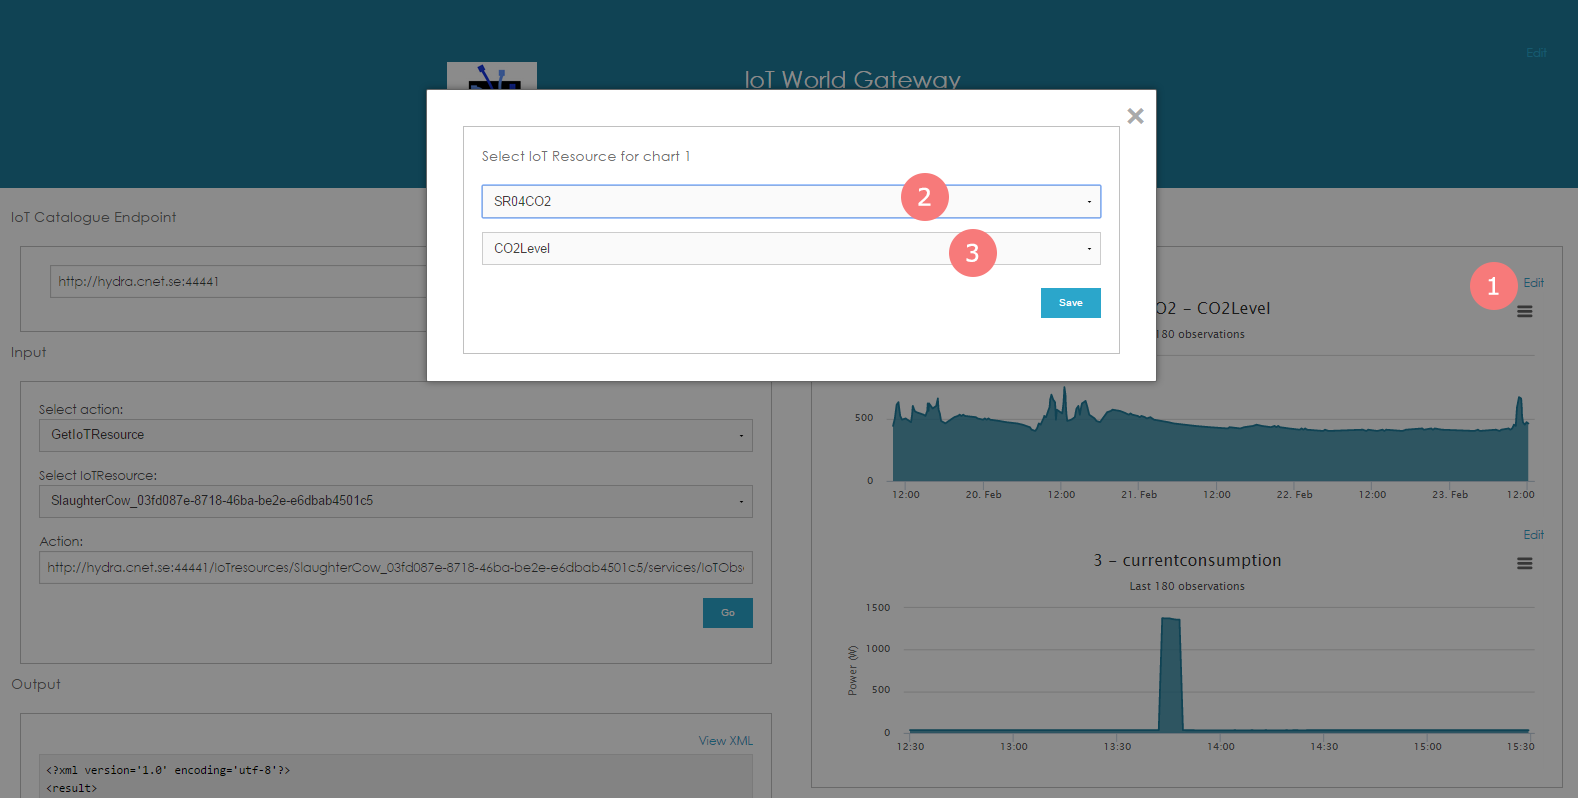
- When you click the “Edit” button to the right of the chart, a pop-up window appears
- Two selections are required in the pop-up window, the first is the IoTResource and the second is the service. Once the selection has been made you click the “Save” button to save the changes. The changes will be saved in the web browsers local storage